Example: Neural Inverse Prompt Management with Langchain (JS)


Neural Inverse Prompt Management helps to version control and manage prompts collaboratively in one place.
This example demonstrates how to use Neural Inverse Prompt Management together with Langchain JS.
Set Up Environment
Get your Neural Inverse API keys by signing up for Neural Inverse Cloud or self-hosting Neural Inverse. You’ll also need your OpenAI API key.
Note: This cookbook uses Deno.js for execution, which requires different syntax for importing packages and setting environment variables. For Node.js applications, the setup process is similar but uses standard
npmpackages andprocess.env.
// Neural Inverse authentication keys
Deno.env.set("LANGFUSE_PUBLIC_KEY", "pk-lf-***");
Deno.env.set("LANGFUSE_SECRET_KEY", "sk-lf-***");

// Neural Inverse host configuration
// Other Neural Inverse data regions include 🇺🇸 US: https://us.cloud.langfuse.com, 🇯🇵 Japan: https://jp.cloud.langfuse.com and ⚕️ HIPAA: https://hipaa.cloud.langfuse.com
Deno.env.set("LANGFUSE_BASE_URL", "https://cloud.langfuse.com")

// Set environment variables using Deno-specific syntax
Deno.env.set("OPENAI_API_KEY", "sk-proj-***");
With the environment variables set, we can now initialize the langfuseSpanProcessor which is passed to the main OpenTelemetry SDK that orchestrates tracing.
// Import required dependencies
import 'npm:dotenv/config';
import { NodeSDK } from "npm:@opentelemetry/sdk-node";
import { LangfuseSpanProcessor } from "npm:@langfuse/otel";

// Export the processor to be able to flush it later
// This is important for ensuring all spans are sent to Neural Inverse
export const langfuseSpanProcessor = new LangfuseSpanProcessor({
    publicKey: process.env.LANGFUSE_PUBLIC_KEY!,
    secretKey: process.env.LANGFUSE_SECRET_KEY!,
    baseUrl: process.env.LANGFUSE_BASE_URL ?? 'https://cloud.langfuse.com', // Default to cloud if not specified
    environment: process.env.NODE_ENV ?? 'development', // Default to development if not specified
  });

// Initialize the OpenTelemetry SDK with our Neural Inverse processor
const sdk = new NodeSDK({
  spanProcessors: [langfuseSpanProcessor],
});

// Start the SDK to begin collecting telemetry
// The warning about crypto module is expected in Deno and doesn't affect basic tracing functionality. Media upload features will be disabled, but all core tracing works normally
sdk.start();
The LangfuseClient provides additional functionality beyond OpenTelemetry tracing, such as scoring, prompt management, and data retrieval. It automatically uses the same environment variables we set earlier.
import { LangfuseClient } from "npm:@langfuse/client";

const langfuse = new LangfuseClient();
Example 1: Text Prompt
Add new prompt
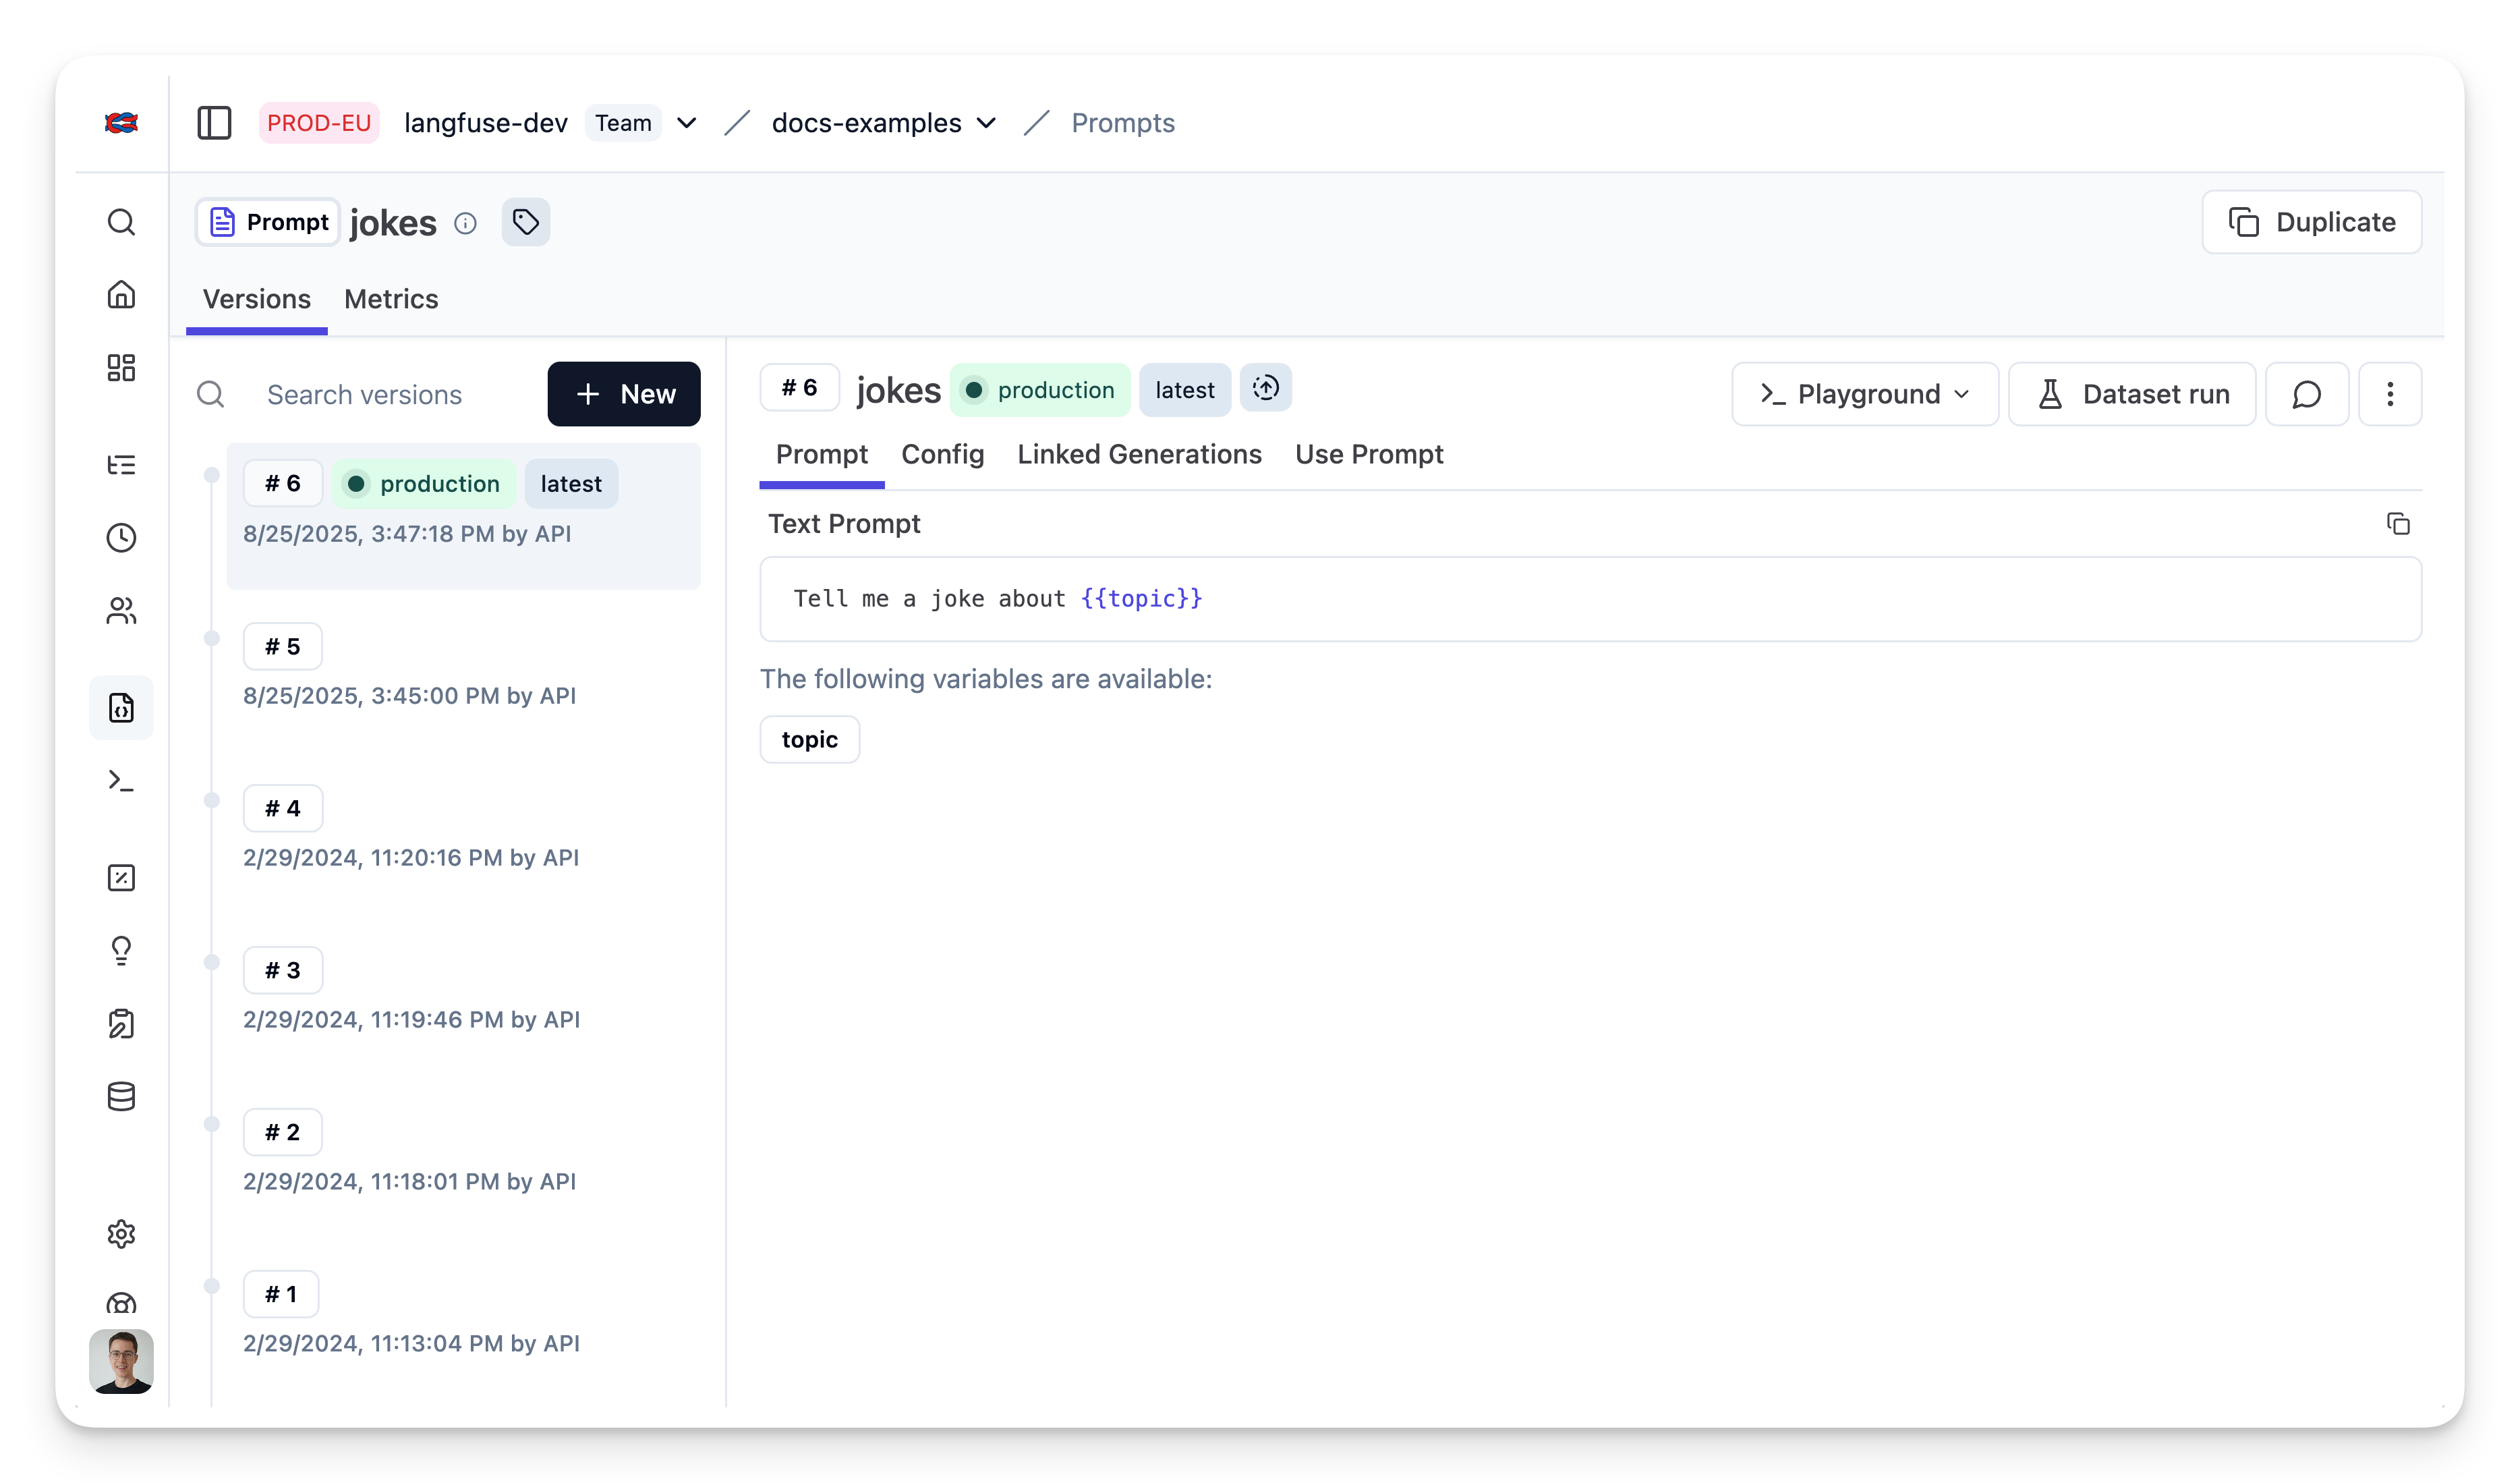
We add the prompt used in this example via the SDK. Alternatively, you can also edit and version the prompt in the Neural Inverse UI.
Namethat identifies the prompt in Neural Inverse Prompt Management- Prompt with
topicvariable - Config including
modelName,temperature labelsto includeproductionto immediately use prompt as the default
For the sake of this notebook, we will add the prompt in Neural Inverse and use it right away. Usually, you'd update the prompt from time to time in Neural Inverse and your application fetches the current production version.
// Create a text prompt
await langfuse.prompt.create({
    name: "jokes",
    type: "text",
    prompt: "Tell me a joke about {{topic}}",
    labels: ["production"], // directly promote to production
    config: {
      model: "gpt-4o",
      temperature: 0.7,
      supported_languages: ["en", "fr"],
    }, // optionally, add configs (e.g. model parameters or model tools) or tags
  });
Prompt in Neural Inverse
Run example
Get current prompt version from Neural Inverse
// Get current `production` version
const prompt = await langfuse.prompt.get("jokes");
The prompt includes the prompt string
prompt.promptand the config object
prompt.configTransform prompt into Langchain PromptTemplate
Use the utility method .getLangchainPrompt() to transform the Neural Inverse prompt into a string that can be used in Langchain.
Context: Neural Inverse declares input variables in prompt templates using double brackets ({{input variable}}). Langchain uses single brackets for declaring input variables in PromptTemplates ({input variable}). The utility method .getLangchainPrompt() replaces the double brackets with single brackets.
Also, pass the Neural Inverse prompt as metadata to the PromptTemplate to automatically link generations that use the prompt.
import { PromptTemplate } from "npm:@langchain/core/prompts"

const langfuseTextPrompt = await langfuse.prompt.get("jokes"); // Fetch a previously created text prompt

// Pass the langfuseTextPrompt to the PromptTemplate as metadata to link it to generations that use it
const langchainTextPrompt = PromptTemplate.fromTemplate(
  langfuseTextPrompt.getLangchainPrompt()
).withConfig({
  metadata: { langfusePrompt: langfuseTextPrompt },
});
Setup Neural Inverse Tracing for Langchain JS
We'll use the native Neural Inverse Tracing for Langchain JS when executing this chain. This is fully optional and can be used independently from Prompt Management.
import { CallbackHandler } from "npm:@langfuse/langchain";

// 1. Initialize the Neural Inverse callback handler
const langfuseHandler = new CallbackHandler({
  sessionId: "user-session-123",
  userId: "user-abc",
  tags: ["langchain-test"],
});
Create chain
We use the modelName and temperature stored in prompt.config.
import { ChatOpenAI } from "npm:@langchain/openai"
import { RunnableSequence } from "npm:@langchain/core/runnables";

const model = new ChatOpenAI({
    modelName: prompt.config.model,
    temperature: prompt.config.temperature
});
const chain = RunnableSequence.from([promptTemplate, model]);
Invoke chain
const res = await chain.invoke(
    { topic: "developers" },
    { callbacks: [langfuseHandler] }
);
View trace in Neural Inverse
As we passed the langfuse callback handler, we can explore the execution trace in Neural Inverse.
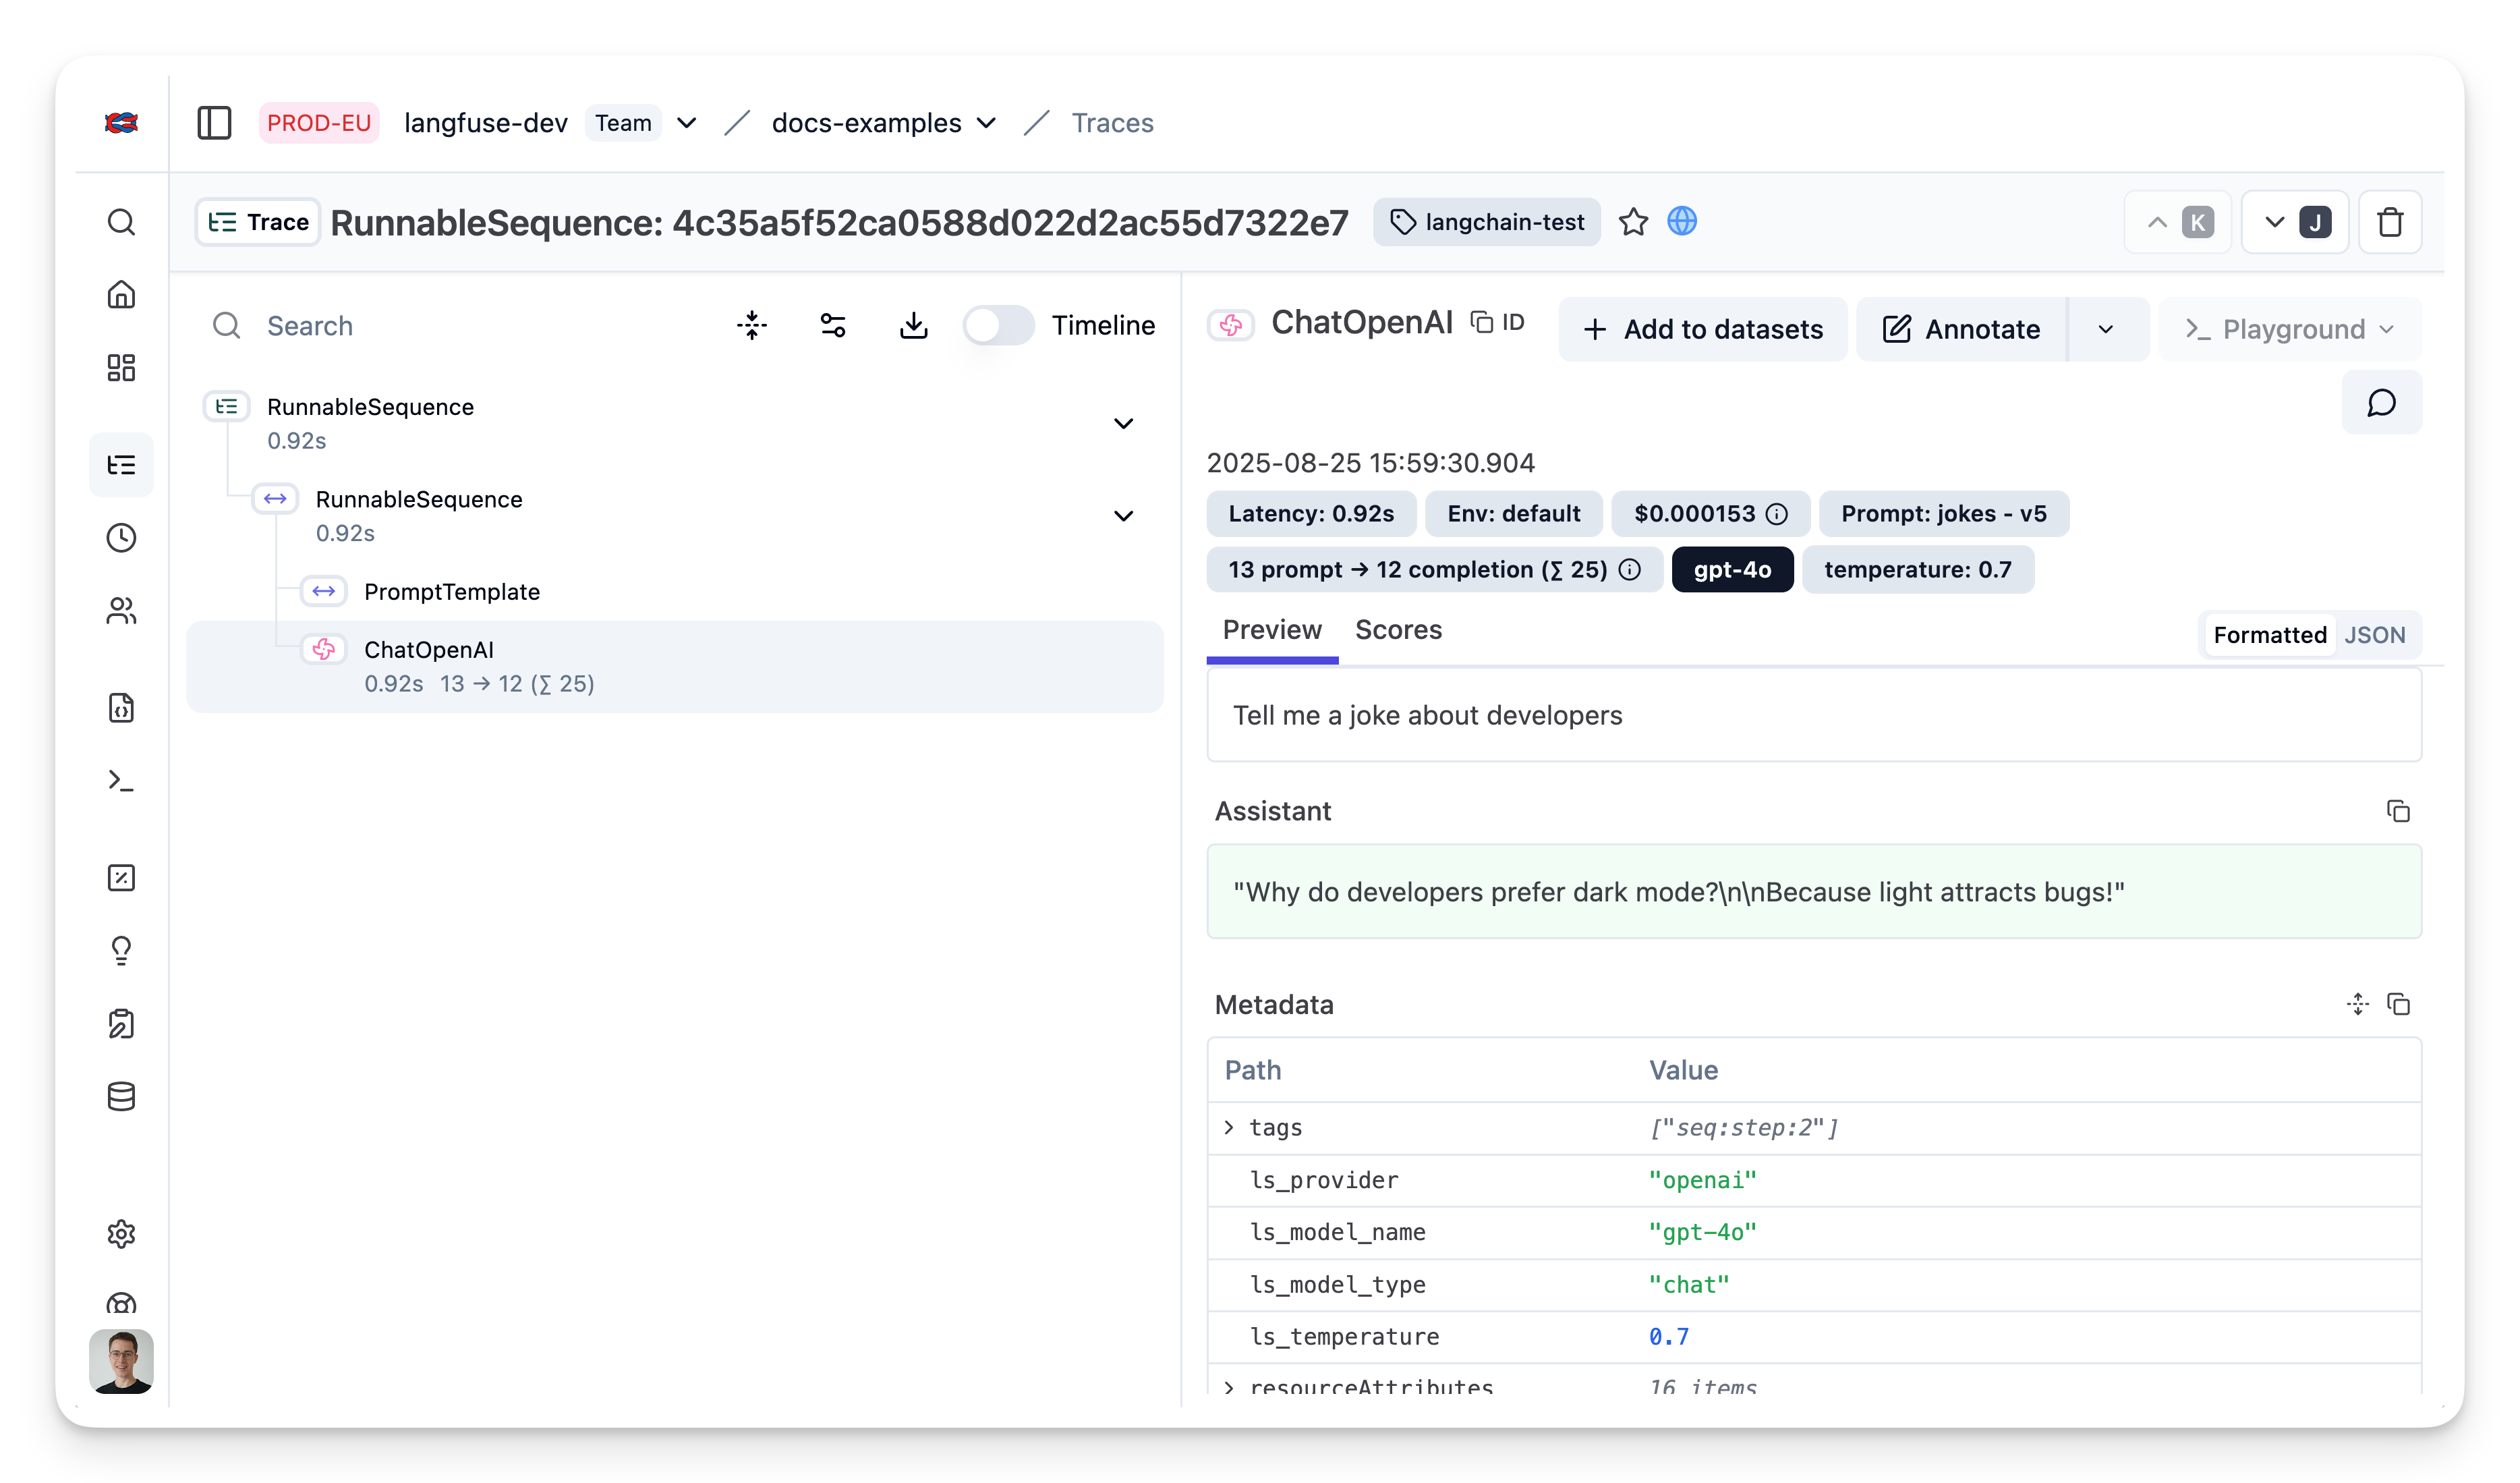
Public trace in the Neural Inverse UI
Example 1: OpenAI functions and JsonOutputFunctionsParser
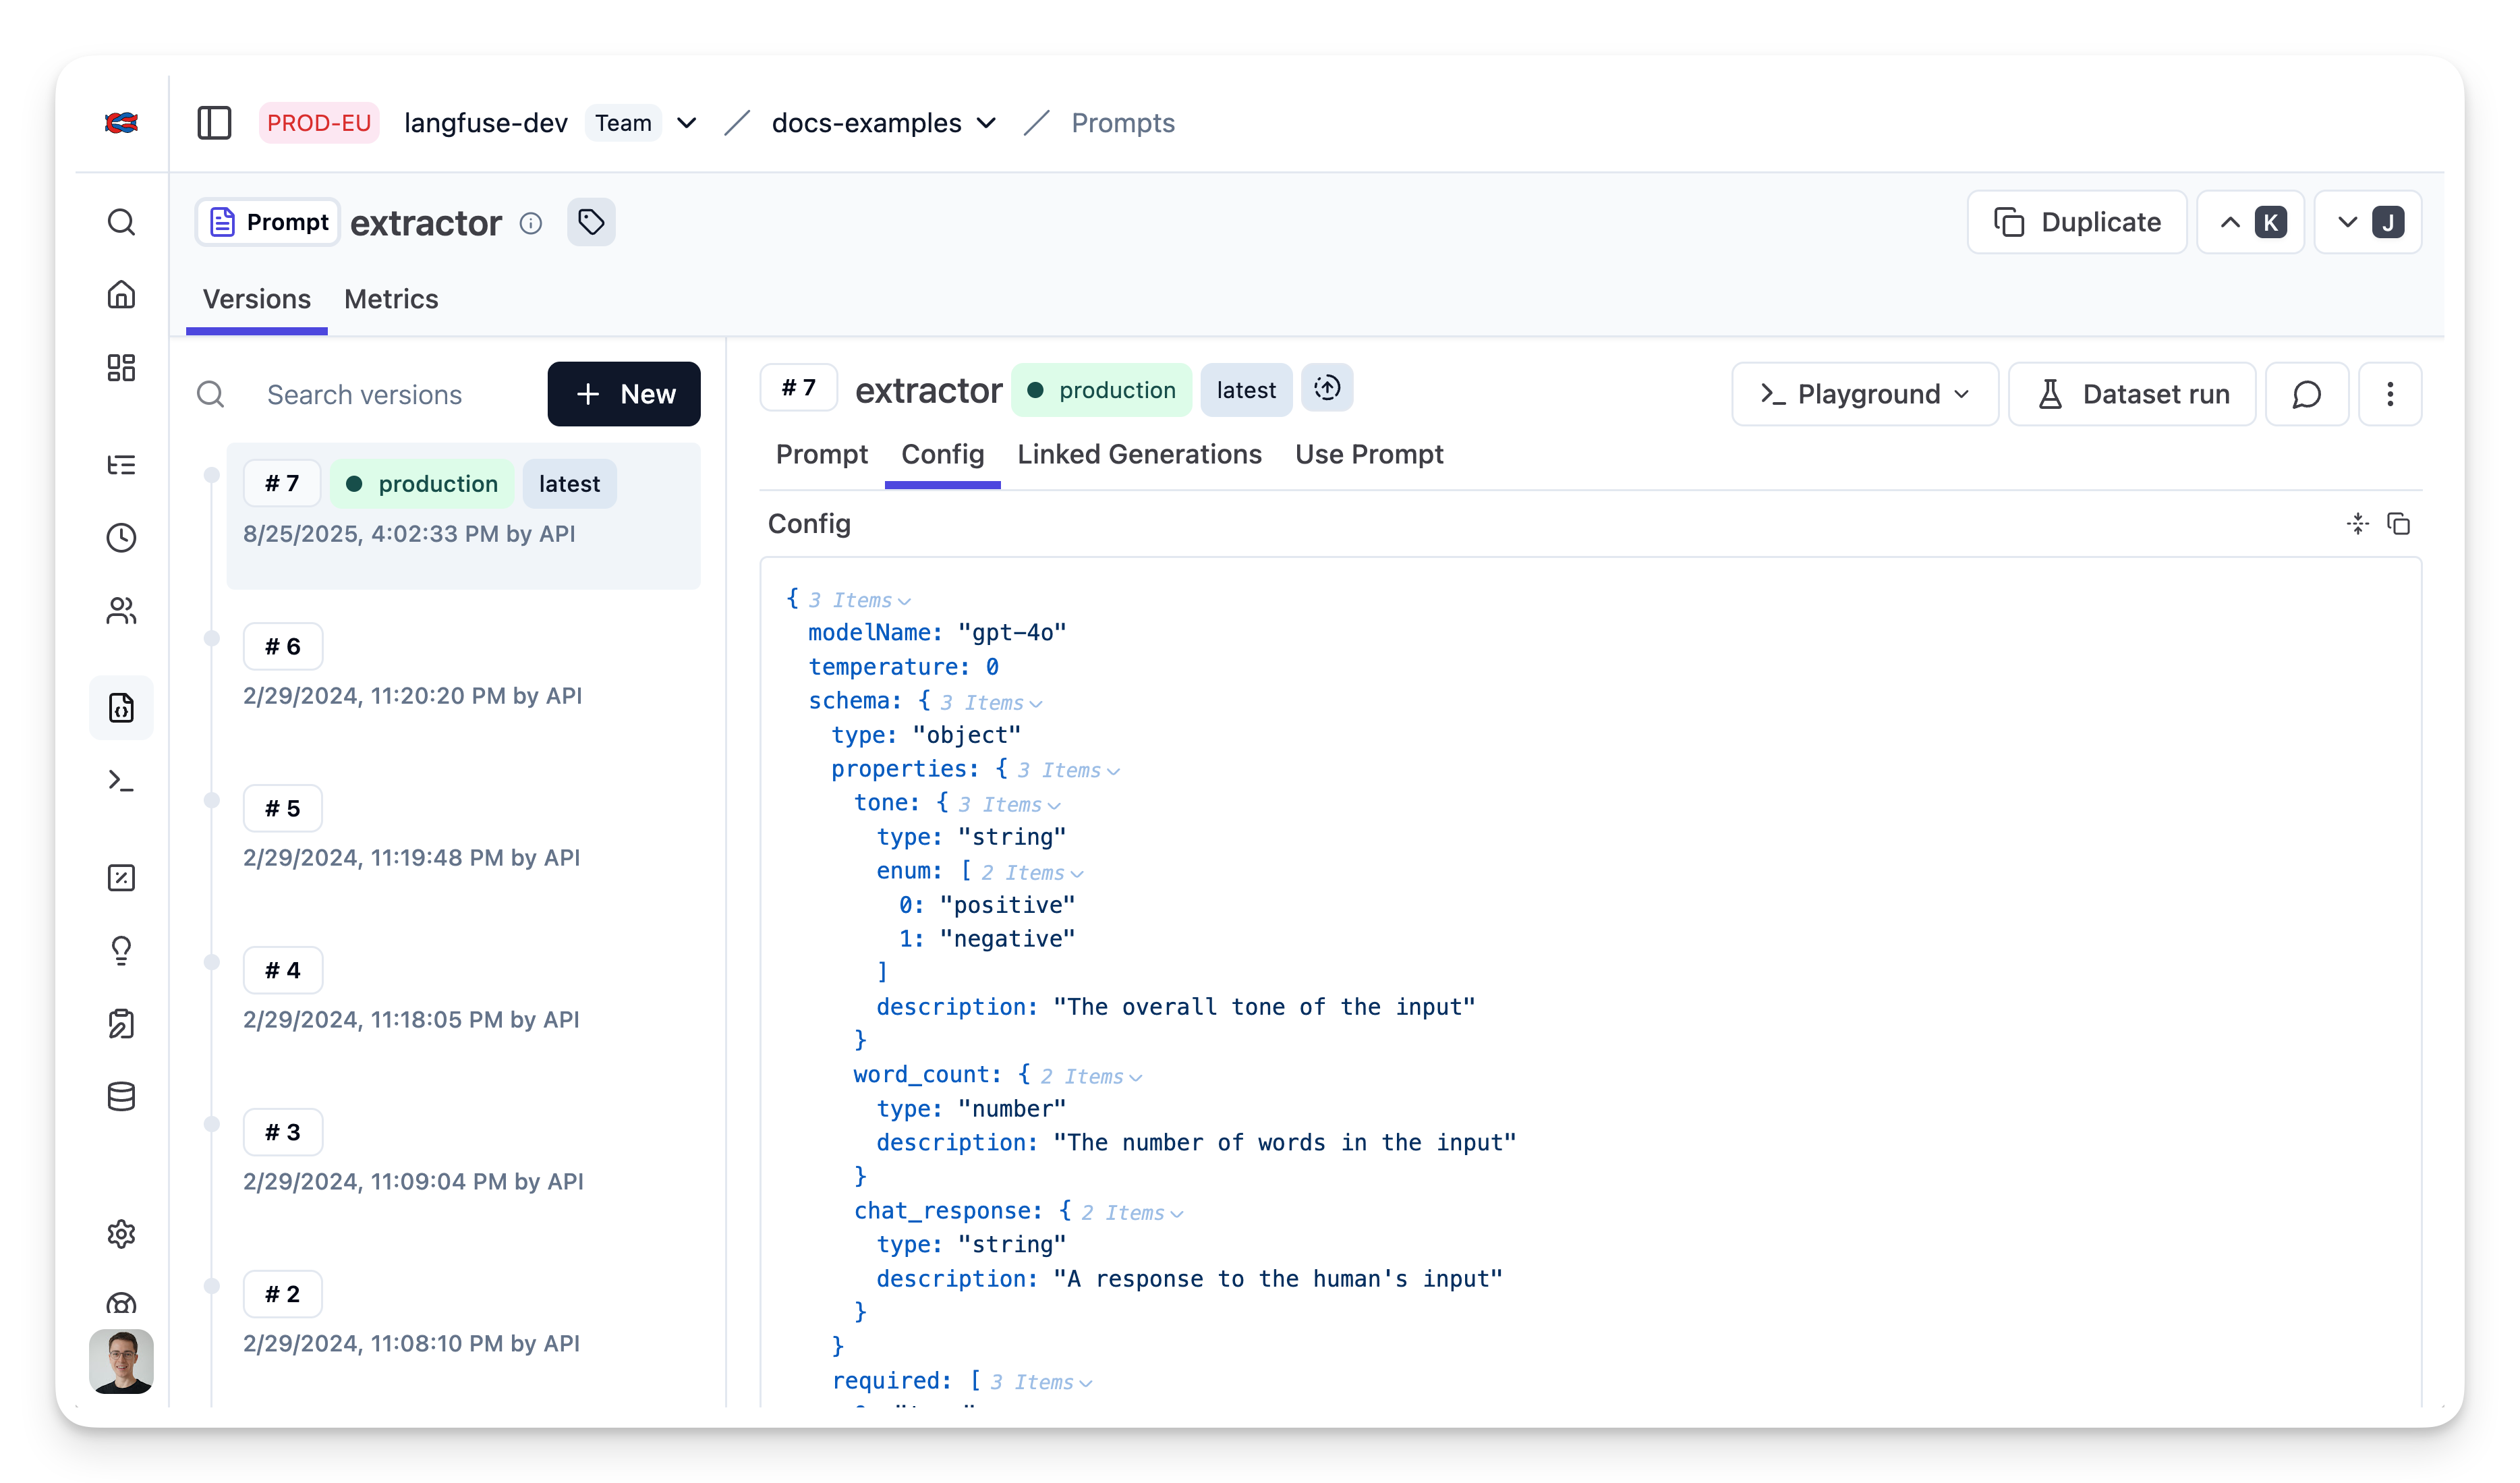
Add prompt to Neural Inverse
await langfuse.prompt.create({
    name: "extractor",
    prompt: "Extracts fields from the input.",
    config: {
      modelName: "gpt-4o",
      temperature: 0,
      schema: {
        type: "object",
        properties: {
          tone: {
            type: "string",
            enum: ["positive", "negative"],
            description: "The overall tone of the input",
          },
          word_count: {
            type: "number",
            description: "The number of words in the input",
          },
          chat_response: {
            type: "string",
            description: "A response to the human's input",
          },
        },
        required: ["tone", "word_count", "chat_response"],
      }
    }, // optionally, add configs (e.g. model parameters or model tools)
    labels: ["production"] // directly promote to production
});
Prompt in Neural Inverse
Fetch prompt
const extractorPrompt = await langfuse.prompt.get("extractor")Transform into schema
const extractionFunctionSchema = {
    name: "extractor",
    description: extractorPrompt.prompt,
    parameters: extractorPrompt.config.schema,
}
Build chain
import { ChatOpenAI } from "npm:@langchain/openai";
import { JsonOutputFunctionsParser } from "npm:langchain/output_parsers";

// Instantiate the parser
const parser = new JsonOutputFunctionsParser();

// Instantiate the ChatOpenAI class
const model = new ChatOpenAI({
    modelName: extractorPrompt.config.modelName,
    temperature: extractorPrompt.config.temperature
});

// Create a new runnable, bind the function to the model, and pipe the output through the parser
const runnable = model
  .bind({
    functions: [extractionFunctionSchema],
    function_call: { name: "extractor" },
  })
  .pipe(parser);
Invoke chain
import { HumanMessage } from "npm:@langchain/core/messages";

// Invoke the runnable with an input
const result = await runnable.invoke(
    [new HumanMessage("What a beautiful day!")],
    { callbacks: [langfuseHandler] }
);
View trace in Neural Inverse
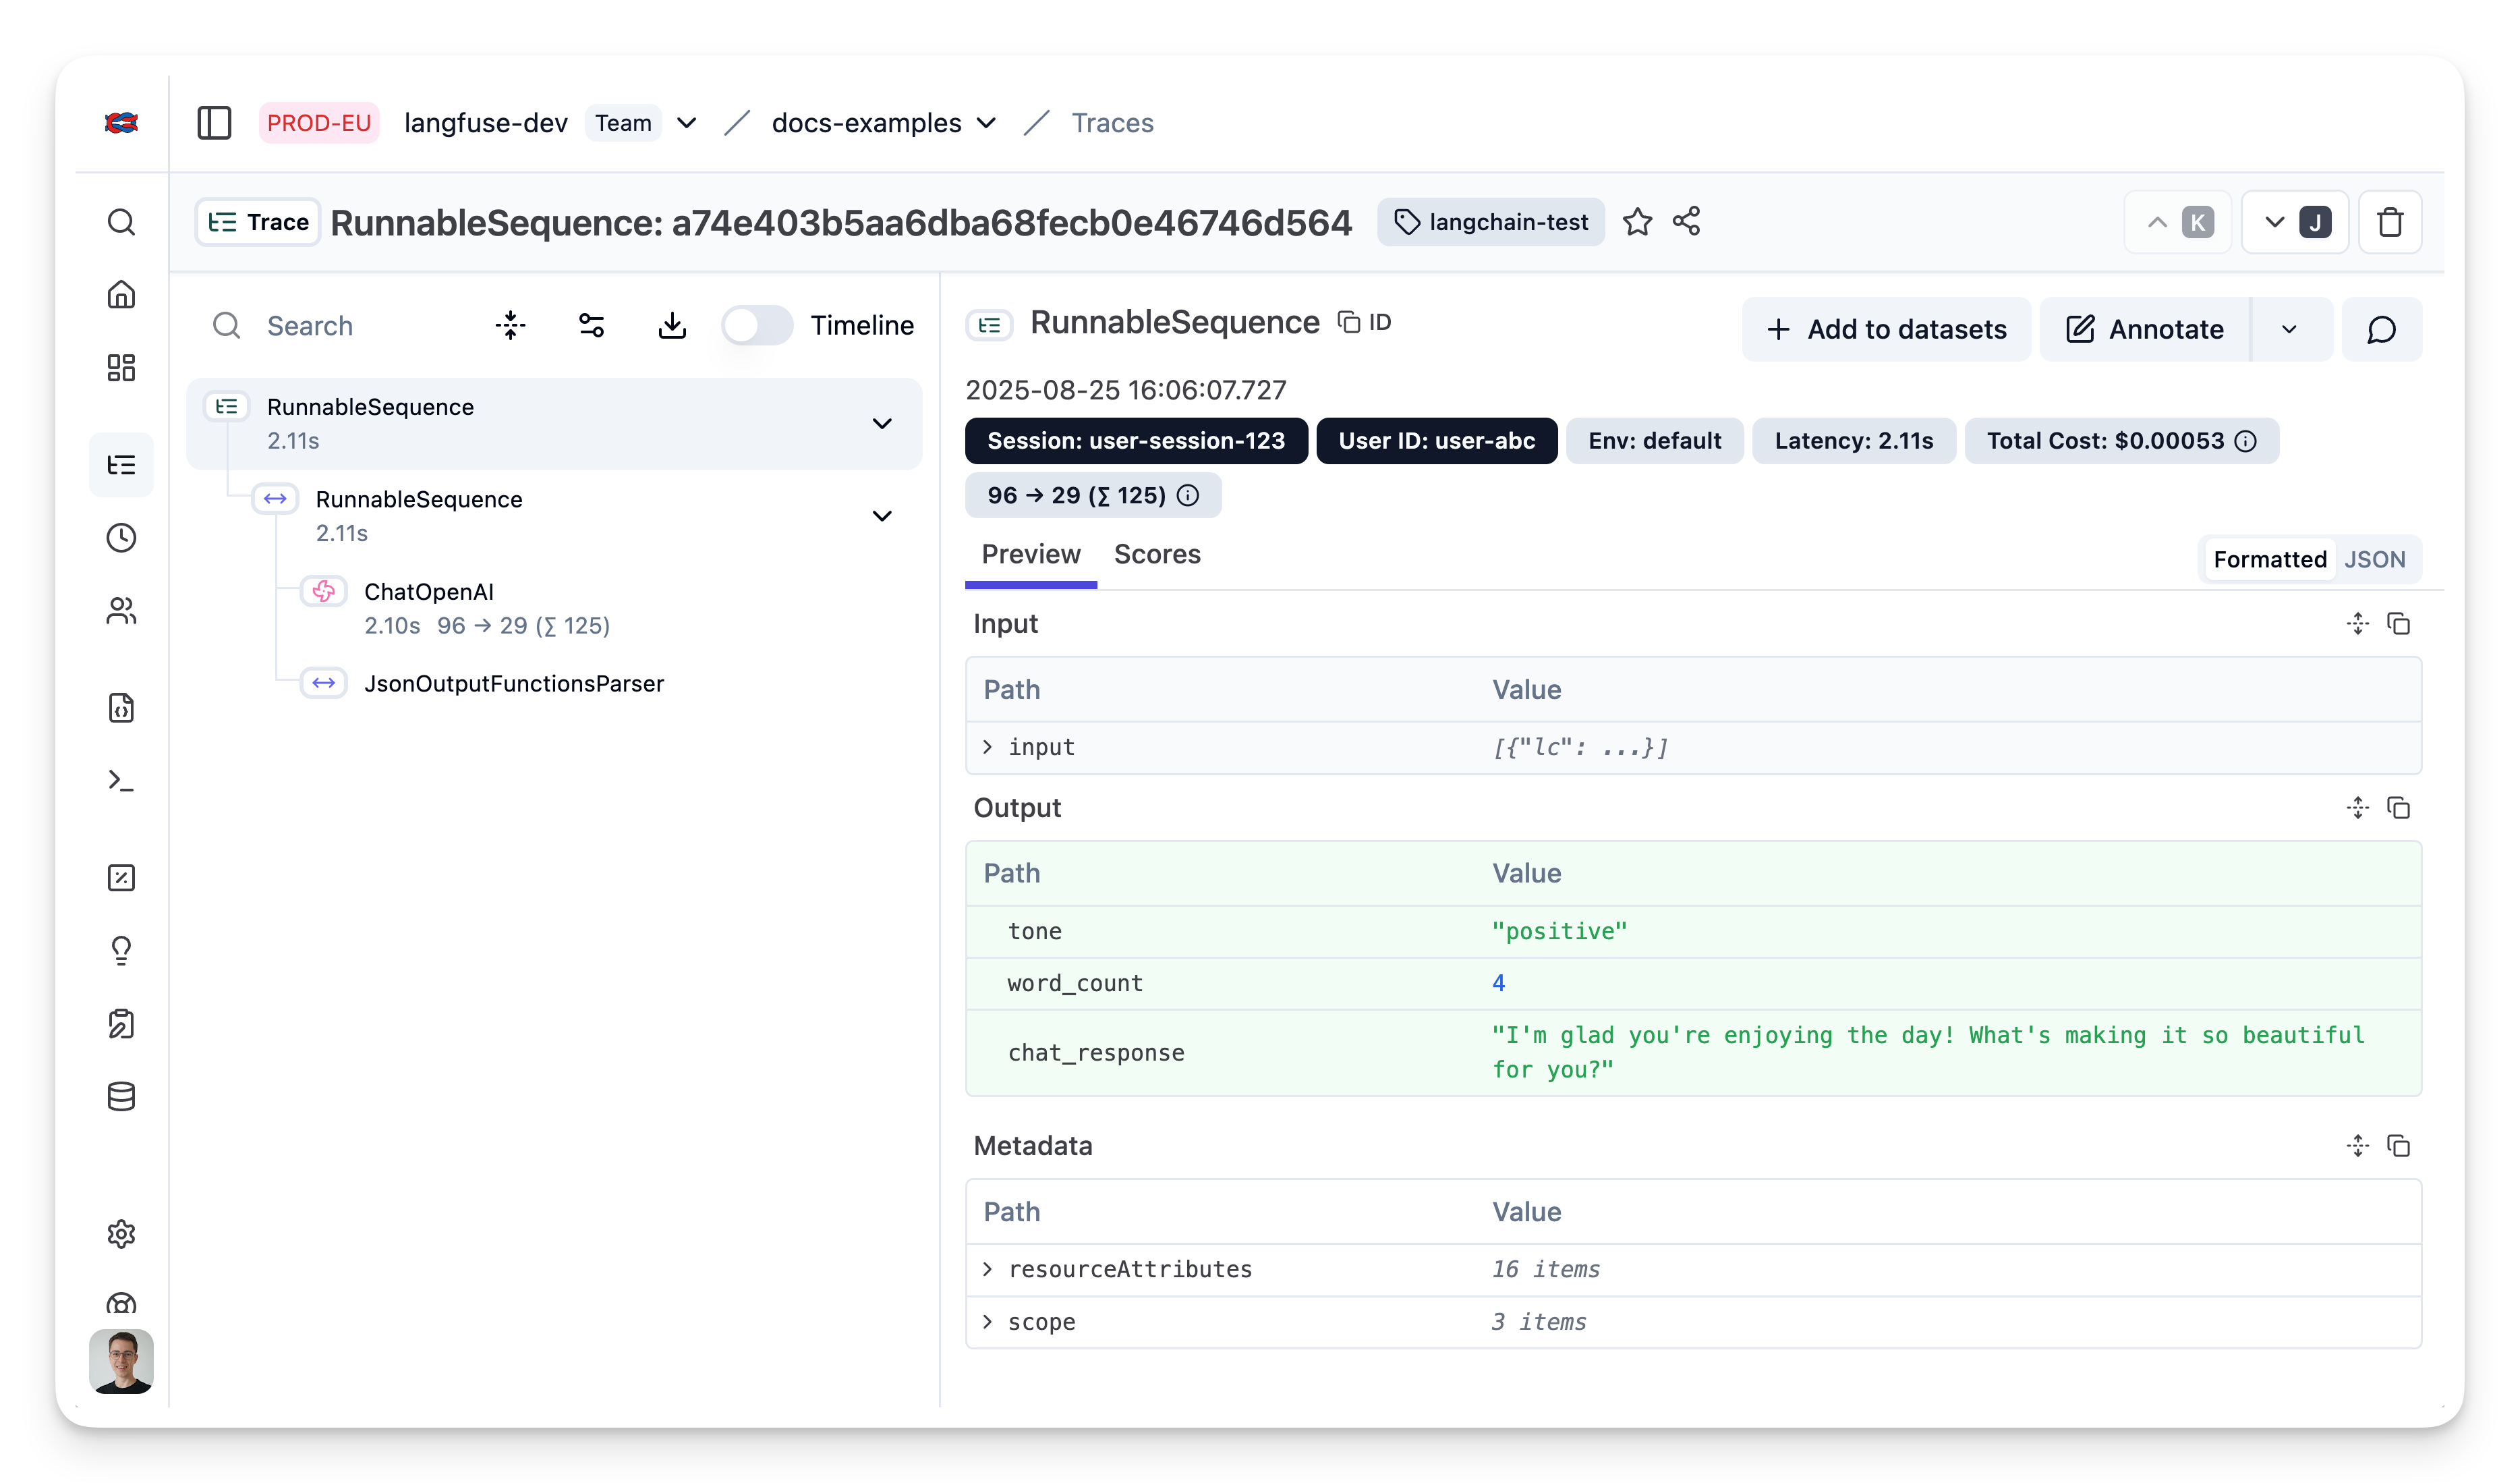
Public trace in the Neural Inverse UI
Last edited