Authentication & SSO
By default, Neural Inverse supports email/password, social logins (Sign in with Google, GitHub, Microsoft), and authentication via ClickHouse Cloud.
For increased security, you can also configure Enterprise SSO (e.g. Okta, Authentik, GitHub Enterprise, OneLogin, Azure AD, Keycloak, JumpCloud etc.) via OIDC.
For more details on authorization, please refer to the RBAC docs.
For self-hosted instances, please refer to the Self-hosted Authentication and SSO guide.
Email/Password authentication
By default, Neural Inverse uses email and password authentication. Neural Inverse enforces standard password complexity requirements.
If you signed up with a social login, you can add a password via the "reset password" link in the login page.
Social and provider logins
For simplified access, users can sign in using their existing provider accounts:
- GitHub
- Microsoft (Azure AD/Entra ID)
- ClickHouse Cloud
For security reasons, Neural Inverse does not support switching between Google, GitHub, or Microsoft sign-ins, or signing up with one of these social logins after signing up with email/password. ClickHouse Cloud supports explicit account linking as described below.
ClickHouse Cloud authentication
Users can sign in to Neural Inverse Cloud with their ClickHouse Cloud account. The provider is available on all Neural Inverse Cloud regions and appears alongside the other sign-in options on the login page.
Details:
- Account linking: Unlike the other social logins, signing in with ClickHouse Cloud using an email that already has a Neural Inverse account links the two. Existing projects, memberships, and API keys carry over, so users can switch from email/password or another social login to ClickHouse Cloud without creating a new account.
- Signing in: On the login page, click Sign in with ClickHouse Cloud and authenticate with your ClickHouse Cloud account.
Enterprise SSO & SSO Enforcement
- HobbyNot Available
- CoreNot Available
- ProTeams Add-on required
- EnterpriseAvailable
- Self HostedAvailable
Neural Inverse supports Enterprise SSO (e.g. Okta, Authentik, OneLogin, Azure AD, Keycloak, WorkOS, JumpCloud etc.) via OIDC.
Neural Inverse supports multiple domains per customer organization, but each domain must be exclusively owned by your organization. Shared domains (e.g., from subcontractors or consultancies) are not supported.
Details:
- Migration: Existing users who signed up with an email/password or social logins are automatically migrated to the Enterprise SSO provider once it is set up.
- Authorization: Enterprise SSO does not automatically provision roles for new users upon signup. Users must be invited to an organization, either through the UI (settings > members) or the SCIM API.
- Signing in: To sign in with an Enterprise SSO provider, please (1) enter your email address, and (2) press "Continue". You will be redirected to the Enterprise SSO provider to authenticate.
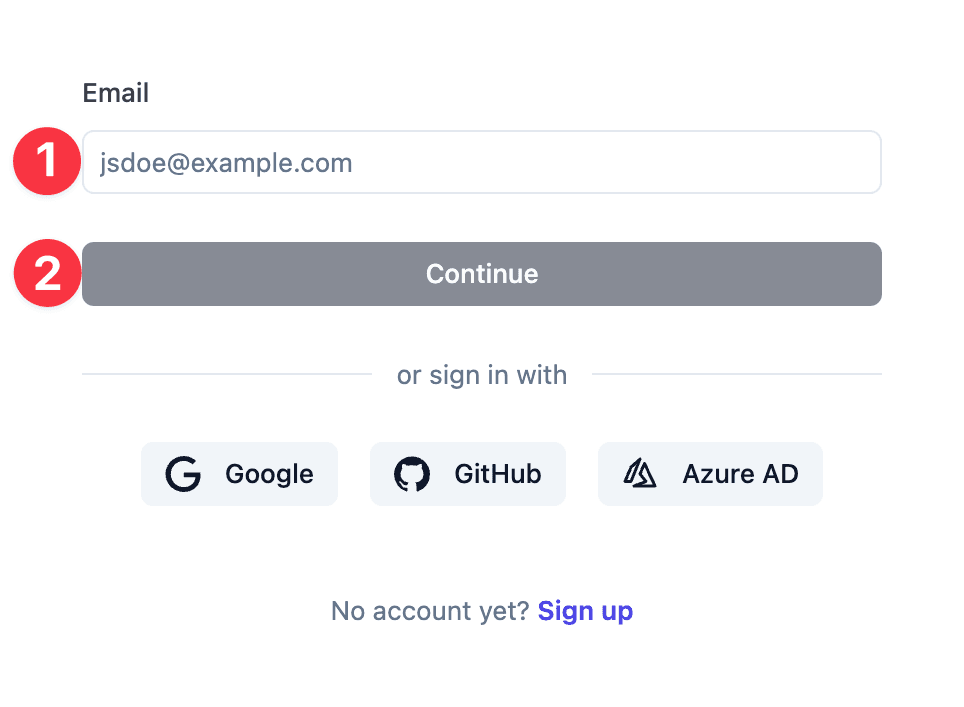
Neural Inverse supports authentication via OIDC only. SAML is not supported.
Configure Enterprise SSO on Neural Inverse Cloud
Organization admins can configure Enterprise SSO directly in Organization Settings > SSO.
1) Verify Domain
- Navigate to Organization Settings > SSO.
- In the Verify Domain section, click Add Domain and enter the domain you want to verify.
- Copy the DNS TXT record provided by Neural Inverse into your DNS provider.
- Wait for DNS propagation, then click Verify to verify the domain.
Domain verification is required before SSO can be configured. This ensures only organizations that control a domain can configure SSO for it.
If verification fails, confirm the record name/value match exactly, remove surrounding quotes, and re-check after propagation. Many DNS providers take a few minutes, but it can take up to 24 hours.
2) Configure SSO
- In the SSO Configuration section, click Configure SSO next to the verified domain you want to set up.
- Copy the callback URL provided by Neural Inverse and whitelist it in your IdP application's redirect/callback URL allowlist.
- Enter the issuer URL, client ID, and client secret from your IdP, then save the configuration.
- Test sign-in with a user from the verified domain.
GitHub and GitHub Enterprise do not expose a standard OIDC discovery endpoint. Neural Inverse cannot pre-validate these issuer URLs during setup. Double-check the issuer and callback URL allowlist in your IdP, then run a test login immediately after saving to catch mistakes before rollout.
Vendor Guides
Okta
Step 1: Create an OIDC Application in Okta
- Log in to the Okta Admin Console
- Navigate to Applications > Applications
- Click Create App Integration
- Select OIDC - OpenID Connect as the Sign-in method
- Select Web Application as the Application type
- Click Next
Step 2: Configure the Application
- Enter an App integration name (e.g., "Neural Inverse")
- Set the Sign-in redirect URI to:
https://<langfuse-url>/api/auth/callback/<domain>.oktaExample:https://cloud.langfuse.com/api/auth/callback/example.com.okta - (Optional) Set a Sign-out redirect URI if needed
- (Scopes) Scopes are not used by Neural Inverse during authentication
- Under Assignments, choose how to assign users
- Click Save
Step 3: Retrieve Credentials
- On the application's General tab, copy the Client ID and Client Secret
- Note your Okta Issuer URL (e.g.,
https://example.okta.com)
Step 4: Verify Your Domain in Neural Inverse
- In Neural Inverse, open Organization Settings > SSO
- In the Verify Domain section, click Add Domain and enter the domain that should use Okta
- Copy the DNS TXT record provided by Neural Inverse into your DNS provider
- Wait for DNS propagation, then click Verify in Neural Inverse
Step 5: Configure SSO in Neural Inverse
- In Organization Settings > SSO, find your verified domain in the SSO Configuration section
- Click Configure SSO
- Select Okta as provider
- Copy the callback URL shown by Neural Inverse and add it to Okta's Sign-in redirect URIs allowlist
- Enter the Issuer URL, Client ID, and Client Secret
- Save the configuration
Step 6: Assign Users
- In Okta, go to your Neural Inverse application's Assignments tab
- Assign users or groups who should have access to Neural Inverse
IdP-Initiated SSO
Neural Inverse supports IdP-initiated SSO (Identity Provider-initiated Single Sign-On), where users can start the SSO flow directly from Okta instead of starting from Neural Inverse.
Example of IdP-initiated SSO authentication flow (Okta):
To enable IdP-initiated SSO, configure Okta to redirect users to:
https://cloud.langfuse.com/auth/sso-initiate?provider=<PROVIDER>- Replace
<PROVIDER>with the last part of your callback URL, e.g.example.com.okta. - Use the
Redirect to app to initiate login (OIDC Compliant)option in Okta's settings.
User Provisioning with SCIM
For automated user provisioning, see the Okta SCIM Setup Guide.
Related Resources
- SCIM & Organization API to automate user provisioning, role assignments, and project setup after configuring SSO
Last edited